Model layer
What can I do with the model layer?
With the model layer you can render 3D model files.
How do I add a model layer?
Choose LAYER > Add layer > Add model layer... to add a new model layer.
The new model layer can be selected from the layers dropdown to make it the active layer.
Examples
The installer comes with shows demonstrating the possibilities of the model layer. Choose FILE > Open show... and select a show from the BluffTitler/Media/Shows/Model folder.
To quickly switch between your own shows and the ones that came with the installer, click on the Personal and App buttons in the upper right corner of the file dialog.
3D model formats
BluffTitler supports 3D models in the GLB, OBJ, STL and X formats. Change the model of the active layer by choosing MEDIA > Change model...
MTL files
MTL files are used by OBJ files to store the materials. Without an accompanying MTL file, OBJ files are fully white and untextured. Make sure to place the MTL file next to the OBJ file.
Animations

When the model contains an animation, it automatically starts playing after loading. Control the animation with the Animation and Animation speed properties.
Import animations
An animation from another model can be imported by choosing MEDIA > Change model.... Joints are matched by name, so this only works when the joints have the same name.
The Translation, Rotation and Scale checkboxes can be used to import only a part of the animation. Marking only the Rotation checkbox gives the best result when the models are very different.
Mixamo
Mixamo automates the process of animating humanoid models. The generated FBX file can be converted to GLB with the standard Windows app 3D viewer.
Textures

The GLB format stores the textures inside the GLB file.
The OBJ and X formats store the textures as separate files. Make sure to place the textures next to the model file.
1) Colour maps
When the model features a colour map, it is offered in the 1st texture slot. Every submodel can have its own colour map.
Texture overriding
The model textures can be replaced in the MEDIA > Change texture... dialog. Click on the Select texture... button to load your own texture. Learn more
Click on the Clear button to clear your own texture and go back to the model texture.
Click the Clear button again to use no texture, even when the model offers one.
2) Normal maps
When the model features a normal map, it is offered in the 2nd texture slot and the Effects\PBR effect is automatically selected.
Fine-tune the material with the FX Normal strength property.
3) Cube maps
The Effects\PBR effect accepts a cube map in its 3rd texture slot. No model format supports cube maps, so the default cube map is placed in the 3rd texture slot.
The default cube map is Textures/CubeMap.dds. Change this in the Default textures tab of the SETTINGS > Options... dialog.
Fine-tune the material with the FX Reflection factor property.
4) Occlusion roughness metalness maps
When the model features an occlusion roughness metalness (ORM) map, it is offered in the 4th texture slot and the Effects\PBR effect is automatically selected.
Fine-tune the ambient occlusion with the Ambient occlusion factor property.
Overrule the roughness and metalness factors with the FX Roughness, metalness factor property.
5) Glow maps
When the model features a glow map, it is offered in the 5th texture slot. Learn more
Submodels
A model is built out of submodels.
Submodel property
When the Submodel property is set to 0, all submodels are rendered. When this property is set to 1, only submodel 1 is rendered. And when this property is set to -1, all submodels except 1 are rendered.
A submodel can quickly be selected by double clicking on the model with the <Shift> key pressed. Click again to reset the Submodel property.
When the Submodel property is the active property, the list of all submodels is displayed when you press <F1>.
Change model dialog
When you want to hide multiple submodels, enter their indices in the Invisible textbox of the MEDIA > Change model... dialog, separated by commas. In the same dialog you can also glow individual submodels.
Unpack model
Press <Ctrl> U to automatically create a separate layer for every submodel.
The container layer can be used to group the submodels together:
- Choose LAYER > Add layer > Add container layer
- Choose LAYER > Add layer > Add model layer...
- Press <Ctrl> U
This way you can give every submodel its own colour, texture, effect, keyframe animation...
Glow

When the model features glowing/emissive parts, BluffTitler automatically renders the glow.
Control the effect with the Glow property.
The effect can further be adjusted with the glow properties of the camera layer.
Glow the whole model
When you want to glow the whole model, mark the Glow checkbox in the LAYER > Active layer properties... dialog.
Glow submodels
When you want to glow individual submodels, enter their indices in the Glow textbox of the MEDIA > Change model... dialog, separated by commas.
Joints
When the model contains joints, they are added as layer properties with the prefixes JX (joint rotation) and SX (joint size).
The JX and SX properties can be animated just like any other property. For example, you can rotate the head of an avatar with the JX Head property. And you can scale the head with the SX Head property.
JX properties can quickly be selected by double clicking on the model with the <Ctrl> key pressed.
SX properties can quickly be selected by double clicking on the model with the <Alt> key pressed.
Press <F2> to render the coordinate system of the active joint.
All nodes?
To prevent the number of JX properties explodes, BluffTitler only turns the nodes that are being animated or used in skinning into a JX property. When you want to have access to all nodes, mark the Turn all nodes into a JX property checkbox in the MEDIA > Change model... dialog.
Morph targets

When the model contains morph targets, they are added as layer properties with the prefix MX.
The MX properties can be animated just like any other property. For example, you can make an avatar smile with the MX mouthSmile property.
Model joint

A container layer can be attached to a joint of a model with the Model joint property of the container layer. The attached layers automatically follow the animation.
This way you can make a hand hold a phone... or an alien!
Here's a step by step guide how to attach a model to a joint of another model:
- Select a model layer
- Press <F2> to render the coordinate system of the active joint
- Double click on the desired joint of the model with the <Ctrl> key pressed
- Choose LAYER > Add layer > Add container layer and answer Yes in the dialog
- Choose LAYER > Add layer > Add model layer and answer Yes in the dialog
- Fine-tune the Position, Rotation and Size properties of the container layer
Detach
Set the Model joint property of the container layer to -1 to detach the container from the model. This way the position, rotation and size of the container are no longer relative to the joint of the model.
Press <Ctrl> + <Alt> + D to detach the container and automatically adjust the Position, Rotation and Size properties to match the attached situation.
Joint blending
By animating the Model joint property you can, for example, make your avatar pick up another object. BluffTitler is smart enough not to interpolate the joint index (for example jumping from 2 to 3 to 4), but instead blends the 2 positions, rotations and sizes (making a smooth transition from 2 to 4, ignoring joint 3).
Animation blending
Models can contain multiple animations. The animation can be selected with the 1st slider of the Animation property. When this property is animated, BluffTitler is smart enough not to interpolate the animation index (for example jumping from 2 to 3 to 4), but instead blends the 2 animations (making a smooth transition from 2 to 4, ignoring animation 3).
Seamlessly looping

Walk cycle with displacement
To prevent the model jumps back to its start position after every loop, you can set the number of loops with the 3rd slider of the Animation property.
Set this slider to -1 to make the animation perform in place, which can be handy when attaching the model to a sketch layer.

Walk cycle in place
When the model performs the walk cycle in place, you have to move the model yourself with its Position property, carefully matching animation speed with walk speed.
Wheel
Set the 3rd style to Wheel to make the model rotate like a wheel when it is moved.
When you only want to to give this special behaviour to a limited number of submodels, for example only rotating the wheels of a car, you can enter the wheel submodel indices in the MEDIA > Change model... dialog. Separate the indices by a comma.
Another way is to prepare the model in your modelling app:
When the name of a submodel contains the text [BluffTitlerWheel], it automatically rotates as a wheel when moving.
When the name of a submodel contains the text [BluffTitlerWalkingSquare], it automatically walks as a tilting square when moving.
Double sided
Set the FX Double sided property of the Effects\PBR effect to 1 to render all faces double sided. When this property is set to -1, it uses the setting as stored in the model file.
Transparency
Use the FX Alpha test property of the Effects\PBR effect to fine-tune the transparent textures.
Not lightened
Enter the indices of the submodels that must not be lightened in the MEDIA > Change model... dialog. Separate the indices by a comma.
Model layer style 1
3D in background
In this style, the 3D model is rendered in the background.
3D in 3D space
In this style, the 3D model can intersect other layers.
3D in foreground
In this style, 3D model is rendered in the foreground.
Model layer style 2
Vertical align top
The model is top aligned
Vertical align centre
The model is centre aligned
Vertical align bottom
This style is useful when placing models on the floor.
Not aligned
This style uses the positions as stored in the model file, without any scaling and translations. It can be useful when a bigger model must be built out of separate model files.
Model layer style 3
Normal
No special behaviour
Wheel
The model rolls when it is moved.
Walking square
The model walks as a tilting square when it is moved.
Model layer properties
Position
The position of the model.
1st slider: horizontal (x) position
2nd slider: vertical (y) position
3rd slider: depth (z) position
Press <F2> to render the coordinate system.
Rotation
The rotation of the model.
1st slider: heading
2nd slider: pitch
3rd slider: roll
Press <F2> to render the coordinate system.
Pivot point
The point around which the model rotates when animating the Rotation property.
When you press <F2>, the pivot point is visualised with cyan, yellow and purple arrows.
Size
The size of the model.
1st slider: width (x)
2nd slider: height (y)
3rd slider: depth (z)
Colour
The diffuse colour of the model.
1st slider: red
2nd slider: green
3rd slider: blue
When you press <F3> and the mouse is inside the tool window, the standard Windows colour dialog is presented. When the mouse is outside the tool window, the colour of the current mouse position is copied: it's a colour picker!
Specular colour
The colour used for specular highlights.
1st slider: red
2nd slider: green
3rd slider: blue
When you press <F3> and the mouse is inside the tool window, the standard Windows colour dialog is presented. When the mouse is outside the tool window, the colour of the current mouse position is copied: it's a colour picker!
When this property is (0, 0, 0), the specular light colour is used.
Specularity
The size of the specular highlights.
Set the specular colour with the Specular colour property.
Glow
When the model defines glowing (emissive) parts, their brightness can be set with this property.
When the Glow checkbox is marked in the LAYER > Active layer properties... dialog, the whole model glows.
Use the Glow properties of the camera layer to control the global glow.
Transparency
The transparency of the model.
0 means fully opaque
1 means fully transparent (invisible)
Submodel
When the Submodel property is set to 0, all submodels are rendered. When this property is set to 1, only submodel 1 is rendered. And when this property is set to -1, all submodels except 1 are rendered.
A submodel can quickly be selected by double clicking on the model with the <Shift> key pressed. Click again to reset the Submodel property.
When you want to hide multiple submodels, enter their indices in the INVISIBLE textbox of the MEDIA > Change Model... dialog, separated by commas.
Submodel explosion
The Submodel explosion property explodes the model into its submodels.
1st slider: the positions of the submodels.
2nd slider: the rotations of the submodels.
3rd slider: random seed.
For a typical animation, the 1st and 2nd sliders are animated and the 3rd is fixed.
Use the Special/FragmentExplosion effect to colour the fragments.
The 3rd slider has special meaning when using a negative value:
-1: Not X
-2: Not Y
-4: Not Z
-8: Positive X
-16: Positive Y
-32: Positive Z
-64: Negative X
-128: Negative Y
-256: Negative Z
Values can be added. For example:
-6: Only X
-5: Only Y
-3: Only Z
-24: Positive X and positive Y
Joint explosion
The Joint explosion property gives every joint a random rotation and size.
1st slider: the max rotation of the joints.
2nd slider: the max scaling of the joints.
3rd slider: random seed.
For a typical animation, the 1st and 2nd sliders are animated and the 3rd is fixed.
Animation
1st slider: the active animation. Models can contain multiple animations. 0 turns all animation off.
2nd slider: play mode
0: looping
1: ping pong
3rd slider: the number of loops after which the model returns to its start position. This is typically used for making a walk cycle continue to walk without jumping back to the start position. When this value is -1, the model moves in place, which can be useful when you want to move the model yourself.
Animation speed
1st slider: the animation speed.
0: no animation
1: normal speed
2nd slider: the animation position. This is only used when the 1st slider is 0.
0: first frame
1: last frame
When you want to animate the animation speed, keep the 1st slider fixed at 0 and only animate the 2nd slider. This gives you full control.
Depth bias
This property can be used to solve sorting problems.
Layers have to be sorted according to their distance to the camera. This sometimes goes wrong when using very big, very small or irregular shaped layers. When this happens, use the Depth bias property to fix it.
Demo models
The BluffTitler installer comes with a few models to play around with.

Bix
Bix is the alien mascot of Outerspace Software.
You can bring him to life by applying the Model/Bix effect. With this effect you can move his arms, legs and eyes.

EZ
Bix's sidekick is called EZ, pronounced as "easy".
You can bring EZ to life by applying the Model/EZ effect.
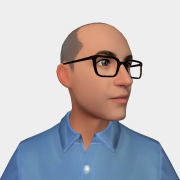
Avatar
The avatar model is a low-poly, low-res game character. By editing Avatar.png next to the model file, you can easily create your own characters.
You can bring your avatar to life by applying the Model/Avatar effect.
Stock sites
Sketchfab
Sketchfab offers many animated models in the GLB format.
Warning: when uploading a model, Sketchfab ignores the layer colour (as set with the Colour property) when your layer uses a texture. When no texture is used, the colour is applied.
Fab
Fab offers many animated models in the GLB format.
3DModels
3DModels offers a huge collection of high quality 3D models.
RIG Models
RIG Models offers many rigged models in the GLB format.
3D Viewer
The Windows 3D Viewer app comes with a huge collection of 3D models. Choose File > 3D library to open a model. Choose File > Save as to save as GLB.
ActorCore
ActorCore offers high quality avatars.
CGTrader
cgtrader offers many models in the OBJ format.
Hum3d.com
hum3d.com offers many models in the OBJ format.
3D CAD BROWSER
3D CAD BROWSER offers many models in the OBJ format.
Tools
Mixamo
Mixamo automates the process of animating humanoids.
Streamoji
Streamoji is a tool for making realistic 3D human avatars.
MakeHuman
MakeHuman is another tool that automates the process of creating avatars.
Cascadeur
Cascadeur is an app for 3D keyframe animation of humanoid and other characters.
AI
Meshy
Meshy is an AI model generator.
Roblox Cube
Roblox Cube is an AI model generator.
CSM
CSM generates 3D models from images.